About

My photo
I often get paid to make people fat,However, I pay even more to get fatter.

Saturday 30 April 2011

Pure soul comforting food


First, let's look at what each word means...

Pure-True to it's originality, without any extra elements
Soul-  life ,spirit and consciousness
Comfort- At ease, freedom from pain or constraint
Food- Reason why I can't fit into my best pair of jeans anymore. 

Now's when you combine them, they simply mean True to  it's origin, being my guilty pleasure makes my mind and soul at ease away from pain. We all need that soothing meal at delicate times in our lives of heart risks, obesity, diabetes and so on. They just simply mean indulgence without a thought like ecstasy even if its for a few moments. 
Many, who choose to dive into this kind of food coma, have no interest in working hard in the kitchen for the gooey triple layer chocolate fudge(even though it would be wonderous) or have a boring ice cream. What we really need is to cleanse our soul for a little while by preparing something that takes minimal time and tastes just as devilish as the triple layer chocolate fudge cake. The absolute treat to the soul!
It's like entering Narnia just through a closet door, minus the drama. A chance to let go in a new world with minimal prep time. 
Let me bring to you quick Pure soul comforting recipes featuring my summer love! Death by chocolate- Ganache pot with a strawberry surprise and a Supreme Trifle up on my next post!


Weight gaining- ly yours
-A-

Tuesday 26 April 2011

First there were steaks-Last part


What those steaks really were and how they were made is what you'll see in this post. To make it more interesting, I'll be sharing the recipe for the delicious Duxelle sauce. A classic sauce in which main ingredient is Mushroom( I LOVE MUSHROOMS…GIVE ME MUSHROOM TEA AND I’LL HAVE IT!!actually, maybe not tea but mostly in every cuisine ) For me this sauce is a win for the entire recipe.

Let's get these long parts over with already! Once this is done and I hope you try it out cause it's extremely appetizing and easy to make. I saved the best for last!!


Ingredients:
I used:
3 pieces left of my undercut
1tsp salt
1tsp black pepper
2tsps lemon juice
2 tsp white vinegar
1 tsp flour
Butter
1 green chili
Mushrooms for the Duxelle sauce
-Shallots for the sauce
lean tomato sauce- paste
-Any herb to garnish (parsley, mint etc.)


Method:
The steak:
Prep your steak with salt, pepper. I prepped 3 of them differently ,its like a  surprise at every bite.
First with black pepper and salt, second with black pepper, salt and chili flakes, third with black pepper, salt and cumin seeds.

Add butter to the deep sauté pan as it melts add your prepped steaks into the pan. Let it cook for 2-3 minutes on each side on a medium heat. Extending a minute or two might be necessary depending on your heat. Move around the pieces, I added 2-3 chili balls and lemon juice Ummmm just the thought of those flavors infusing into the steak. Drool drool !! Check your meat for your type of feel. Even though most 5 star restaurants cook their steak at Well-done stage. I like mine at Medium :)!

Set aside.


Duxelle sauce:

Mince at least 4 mushrooms and slice 4 more and dice the shallots
Add butter to the sauté pan and bring it to a gentle sizzle. Add the shallots and minced mushrooms. Allow it to cook good till it changes slight color.
Add tomato sauce and flour and stir constantly. Make sure no lumps are left. Allow it to cook for 5-7 minutes. Add sliced mushrooms.
Turn down the heat add a pinch of salt and pepper and mix.

Brilliant sauce is ready!


Serving:
Finally!! This is my plate up! and how the steak look like at every bite! Go on! let's surprise the butcher today and increase his sales cause this one definitely worth making yourself. It's also the easiest way to impress someone. I got my dad credit card and also, got 4 proposals!! Haha It’s looks, tastes and smells exquisite and extremely lovely. High style dinner at home :D
Oh did I mention out of the four proposals one was a girl :P! (let's distract you from this inappropriate discussion)


You see from then on how brilliantly world changed :) Now, steaks are endlessly awesomer! You could make exactly this or just one of them or experiement! I'll be sharing more steak wonders in the future till then...

Bonn Appetite!!:)
Match making-ly yours
-A-

First there were steaks- Part two

Mashed potatoes
Years and years ago Mashed potatoes originated specifically in (1771) at least that's what wiki tells me. This simple recipe that is apparently the staple of European culture involves an extremely complex history, which I'm sure not many are interested in. Like all guilty pleasures this too has a very basic foundation but you can always get creative and add flavors, Some guy called Metric Martyrs suggested, mustard, garlic, cheddar or basil mashed potatoes with herbs would be a good idea.  Which probably would be but I didn't make that, so, stop getting distracted and wipe that drool of cause a lot of drool is coming down here!

Also, I've got something different from the usual to go with our steak and extremely good! All ahead!

Ingredients:
2 potatoes
1 spring onion
1 carrot
1/2 cup milk
2 tsps. salt
3 tsps. lemon juice
1.5 tsp. black pepper
1.5 tbsps. of butter
2 tbsps. Of olive oil

Method:

First you'll need to peel and wash the potatoes. You can leave some skin on the potatoes to give them more of an old-world, traditional flavor and texture. This may make mashing a bit more difficult but it'll be worth it, I promise.
Cut them in half and add the potatoes to a pot with cold water so they don't turn brown as you're cutting them up or attending a phone call or....,you can add salt at this point. Over high heat bring the water to boil and then turn down they can simmer for 15-20 minutes.
Remove them from the heat and drain long enough to remove all the water.
Now cut them into quarter pieces. Let them cool a little if you want.
Add butter to the pan and in goes the cut potatoes.  Fry them until all the sides go slightly brown.
Next step,start mashing them up. There are many fancy techniques to mash them up like mixers and food processors or shredders but I used my fork to cut and mash, cut and mash a bit of work there but it's worth it.
Take them out in a separate bowl. Add the milk(heating the milk will help make your potatoes creamy) I didn't do that.
Julienne chop carrots and onions and cook them in 2 tbsp of olive oil.

Add salt, pepper, lemon juice,the cooked onions and carrots and if you want chili flakes and keep mashing and mixing. Mash it till you get rid of the lumps but not so much that your potatoes end up sticky and gluey.

Here's what mine looked like on the plate. I garnished it with mint and chili that I'll be using in my last part of "first there were steaks" Just to add color to the plate.


Continue to part 3


First there were steaks - Part 1

Well, then there were people who realized that steaks can be taken on a complete different level with different styles of selection and preparation. Here are the ones I tried out in my second class.
Be patient. It’s only long because I’ve decided to be very specific; also, thought I’d share some knowledge with you. It’s super easy :) (it is! trust,you, me! ;])
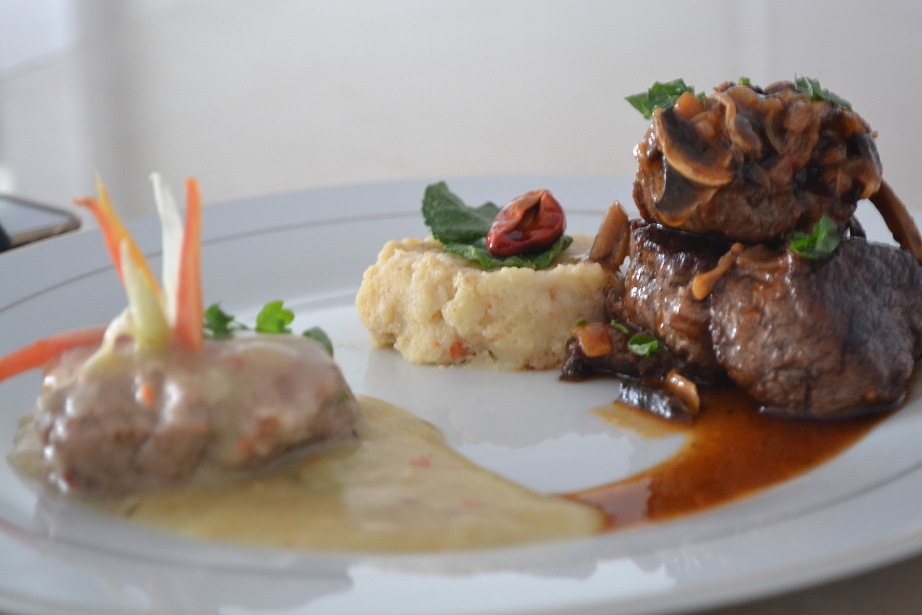
This is what I made and what you'll soon be able to master


Poached Mutton steak
Normally for steaks, the best cut  would be the Tenderloin also known as eye fillet. For starters I've taken Undercut of the Tenderloin, known best for roasts, barbecue, grilling or pan frying. It's the tail end of the Tenderloin. Before I started the process of slicing up the meat, I used my knife to peel out the extra layer of muscles on the meat. (for the entire 3 parts I've sliced the meat into 4 pieces that can be used for the different sauces/techniques you'll see ahead)

Ingredients:
1 steak (Undercut)
1 carrot
1 spring onion
2 pods garlic
1/2 cup of vinegar
1/2 cup of stock
1.5 tsp of salt
1tsp black pepper
1tsp red chili flakes
2tsps honey (you can use sugar)
2tsps flour
1 tsp. butter
1tbsp oil

Prepping the piece of meat:

I picked one of the pieces I had cut and started to  prep it with salt, pepper and red chili flakes. once I covered both sides, I used my knife and STABBED it at the center of the meat. jerking my hand back and forth to make a role in the middle. (release your anger, if you may :P)

Cut out half of both the spring onions and carrots into julienne strips and stuff them in the hole made at the center of the meat.

This is what it looks like.


Preparing the poaching reduction

First make the basic roux sauce that we've used a few times in my earlier post by adding butter and flour to the saucepan. Instead of making a white sauce by adding milk, here we add the 1/2 cup of stock (any stock can be used, I used chicken) you could add all or add enough to level up to the piece of meat.
Add salt, pepper and honey. Stir (follow the measurements given in ingredients)
Add 1 tsp. of vinegar

Poaching the steak
Gently place your steak into the pan when the reduction comes to a boil (bubbles). My leveling was slightly low, so I used a spoon to coat the top bit that wasn't entirely dipped in the reduction. You’ll notice your meat shrinking.  You might also notice my vegetables are shorter, No, they didn’t shrink I replaced them with shorter ones.


When your meat is ready depends on how you like it.

Let me tell you something I learnt about the stages where you can tell when your meat is done.
Even though originally there are 6 (very rare, rare, Medium -rare, Medium, medium-well, well-done) but I'll tell you about the important 4 that will help you identify exactly what your type is.
Look at your left palm (Right won’t make a difference, I just went with left)
Rare- With your right hand index finger touch the very end of your left palm(follow your last finger to the end of your palm) when you press it you'll feel the tight and tougher part of your palm that's when your meat is rare. When you look at your meat, you'll see that the center is red and gradually it becomes pink away from the center.

Medium rare-Now slide slightly upwards just in line with your inner thumb thats how medium rare feels like. The color of the meat is most pink from the center outward with no blood red areas and is gray brown on the surface. The meat is tender and juicy.

Medium - Slide upwards between the two horizontal lines on your palm and feel it just on top of the first line and you sense it a lot softer than Rare or Medium Rare. The meat is a bit pink in the center and gradually become gray brown towards the surface of the meat. The texture of the meat is firm but meat is still somewhat tender.

Well done-The end of the very top of your palm in line with your last finger is what your well done meat feels like. The meat is gray brown throughout with no sign of pink in the center the texture is chewy and fairly dry the surface of the meat is crusty and flavorful.

Don't be afraid to touch the meat while cooking! I know I was, then I just couldn't stop touching :P the poaching sauce was delicious!:D

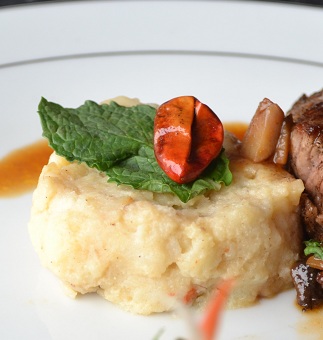
Also, this is what mine looked like at every bite!

Continue to part 2


Saturday 23 April 2011

Sweet summer morning with my summer love

Sweet Egg in the Hole


Ingredients:
                
1 egg
1 toast
4 strawberries - minced
1tbsp butter
1 tbsp. honey

Ingredients for Tea custard
1 cup milk
2 tbsp sugar
1tbsp honey
1 tea bag
1 egg yolk
1/2 star anise (ungrated)  - you can use clove as an alternative
2 black pepper corns- Kept whole


METHODs:

Method for Tea custard (Crèmes moulèe)

Heat the milk until hot, add Star anise and two pepper corn to add flavor.
As the milk starts to heat up before adding the below ingredients take the Star anise and Pepper corns out.
Add sugar and a pinch of salt. Stir until dissolved.
Whisk the egg yolk separately until smooth. Slowly pour it into the pan while moving your spatula in an "8" manner. Continue until all the yolk has mixed in. This process is known as emulsification
Add Honey and continue stirring.
(You’ve made custard, wohoo!)
Pop in the tea bag and let it cook for a 45 sec- 1 min. Use your spoon and gentle squeeze a little while sliding the tea bag out. This will leave natural color and taste to the custard. (Do not squeeze to hard)

READYY…set aside.

Method for egg in the whole:
In a bowl beat your egg till it’s fluffy. Add the minced strawberries and one tbsp. of honey. Fold them over the other until mixed well. (Do not beat, fold them like your fold your jeans. Retain the fluffy texture)
Make a hole in the bread, by roughly squeezing the center out. Make sure to have same thickness of bread left on all ends.
In a separate sauce pan add 1tbsp of butter and let it melt
Toss your bread in and move it around on the pan for about enough seconds till the bottom changes slight color and flip it. (Don’t let it brown too much, once you add the egg it’ll take time to cook. There won’t be any flipping after which can cause the bread to burn)
Now, add your egg mix into the hole. While cooking it, use your spoon to take the excess butter on the pan and pour it onto the egg in the hole to allow it to cook well.
Add the tea custard on the corners of the bread to add extra flavor
Don't worry if you slightly burn your bread underneath even though professionally it’s not acceptable. I think the dark brown crunchy bit add to the fusion of flavor. (Yes, I burnt it a little)

Serving:
Extremely important part of every menu! Specially desserts. After a good meal, a color less and less presentable dessert is of no one’s interest. Make it so, that even the crazy eater can't resist wiping the dessert plate of.
In my dish, honey was first drizzled from top to end of the plate. Then the tea custard was added following another wavy line across of cream. Topped with sliced strawberry which was also dripped with a little cream.


Bonn Appetite!

Sweet crunching -ly yours
-A-

Strawberry Paneer bread pudding

Since I toke up an entire post on my love for strawberries, I’ll get on with the lovely recipes.

Ingredients

4 strawberries - quartered
3 strawberries - diced
1/2 pat of Paneer( fresh cheese)
1 bread slice
1tbsp butter
1tbsp sugar
1tbsp honey

Ingredients for Tea custard
1 cup milk
2 tbsp sugar
1tbsp honey
1 tea bag
1 egg yolk
1/2 star anise (ungrated)  - you can use clove as an alternative
2 black pepper corns- Kept whole


METHOD:
It’s only long because I’ve decided to take baby steps. Else, it’s easy and ingredients are readily available. Stop being lazy… it’s a matter of strawberries!

Method for Tea custard (Crèmes moulèe)


Heat the milk until hot, add Star anise and two pepper corn to add flavor.
As the milk starts to heat up before adding the below ingredients take the Star anise and Pepper corns out.
Add sugar and a pinch of salt. Stir until dissolved.
Whisk the egg yolk separately until smooth. Slowly pour it into the pan while moving your spatula making an “8” at a relatively fast pace, mixing it well. Continue until the yolk has mixed in.
Add Honey and continue stirring.
(You’ve made custard, wohoo!)
Pop in the tea bag and let it cook for a 45 sec- 1 min. Use your spoon and gently squeeze a little while sliding the tea bag out. This will leave natural color and taste to the custard (do not squeeze to hard).

READY…set aside.


Preparing the caramelized Strawberry on a pan:

Strawberries have high water content; they caramelize about as well as ice cubes. Quarter about 2-3 strawberries (make sure you pick the slightly firm ones). Add granulated sugar to your sauce pan and as it melts add your strawberries to the pan and mix and stir till the sugar starts to brown and strawberries change texture.

Turn off heat and set aside.
Later you’ll also notice the juices released by strawberry and the sugar liquid start to crystallize. This method is also known as the crystallization process.


Preparing the Strawberry Paneer Bread:

If you're using fresh strawberries, especially the huge one with the tartly flavor to it...eat a piece or two just to have yourself warm up to the fact that this seasonal fruit is…I’m pretty sure you got the idea from my last post.

In a separate bowl cut your bread out in bits and pieces like the hair on a sheep. Looks exactly like a bad hair day and scattered.
Add the half pat of Paneer and dump your diced/minced strawberries into the bowl
Add one tbsp. of honey
Next; work your hands into the mixing bowl. You may use a spoon but your hands allow it to combine better.
Take enough mixture, make it into a ball. Place ball through flat skewers, and shape into square like shape (always make sure when flattened or shaped the mixture shouldn't be bigger than your palm)
Repeat with remaining mixture.
Set them aside


Sautéing:

Melt the butter on medium heat.
Place your finished mixture into the pan and move it around to avoid it from sticking to the pan or break while flipping.
After a minute check for the change in color, drizzle Tea custard on the pieces and flip over. Repeat for the other side.

Serving:

So much I can use to plate this dish up! Caramelized strawberries, custard, fresh strawberries, cream, the water realized through caramelizing or the crystallized content left after. Even though I think the above is a lot to choose from, if something else excites your senses in your kitchen, add up! Keeping in mind the flavors and how they’d combine.
I used just a few of those.


Bonn Appetite J!
Custard dripping-ly yours

-A-

Monday 18 April 2011

I hate it but I can't help falling in love!

We all go through that anxiety, the rush, the hatred yet the love we ozz is beyond what words can ever explain. It's happening again! It's summer, I hate it but every year it brings along this color of love that's almost impossible to neglect. It has come, with the shape and color that beats in all of us.

Welcome Strawberries, our summer love shall now begin...yet again. You don't know how much I missed your ripe , moist, firm yet soft texture. You're truly like love to me, with little imperfection and little differences in each of you.. yet, perfect in so many ways.

The minute I saw you in class, you caught me by surprise... oh how could I have forgotten, it's your time. You're finally here...to make my summer sweeter and lovelier. A whole new experience all over again.Really, when I wasn’t looking for love, it came looking for me.No matter where you come from…you always bring either tartness, sweetness, juiciness or an ultimate experience all in all.

This time around… I’m going to make great memories with you.
Lovingly yours
-A-

Tuesday 12 April 2011

Experiment-Pan raised chicken with Chili-lemon sauce

Continuing warning from my last post. I made slight amends to the recipe of the sauce. Instead of Mustard sauce I made Lemon and chili fuse to make a complete different blend. Here is what I got


What went wrong?  As you can see the sauce is a lot thicker, even though I like it that way it toke alot of milk to get it to that texture and that was because I decided I was too smart to add extra ingredient above what was suppose to be added. I, in a very professional manner threw the flour into the pan like there wouldnt be any tomorrow hence I got a very floury taste...to eliminate that I added extraa lemon and chili above what I actually wanted to add. My bad

Though in all fairness it was edible... my brother and mum ate it all up.

Pan raised chicken:

I used the exact same method for chicken as before. You may add mint or parsley or any other herb you prefer for the stuffing. I ran out of them, so I settled with the same sliced green chili and red chili flakes, as used earlier in the pan raised chicken with mustard sauce recipe.


Lemon-chili sauce (right way):

Its ingredients and method:

Follow the same roux method as provide for the Mustard sauce...FOLLOW IT (don't worry about the
thickness, it thickens as it cools)


Add pan roasted vegetable if you please (I didn't)


Instead of  Cumin and Mustard seed add whole chili (balls) (cook like you'd cook the cumin and seeds taught in the mustard sauce recipe)


Chili flakes (I used cause of my extra lemon and extra flour mess to add spice)


Lemon drops (DROPS) :)

I garnished the sauce with lemon zest to add color 

Walaaaa! You've got lemon chilli sauce...better than the one I made, for sure.


Like I said earlier you can make your own sauce by experimenting with spices like origano or pepper or add more vegetables or anything else you might think blends well.  Don't worry if you screw up a few times, look on the bright side...you'll have better stories everytime. Also, you can always learn from the mistakes and make it again and again!

Bonn Apettite!

-A-


Pan raised chicken with Mustard sauce

This is one of those recipes that you can amend and experiment with different spices and herbs once you know how to make the basic roux(*roo) for the white sauce and to butterfly chicken. Most of all it's super easy. It's the Plate up from my first class that I have blogged about last.

          Ingredients:

  • 1 chicken breast
  • 1 onion- dice sliced
  • 1 carrot- Julienne stripped and dice sliced
  • 2 garlic pods - minced
  • 2 tbsp Flour
  • 1 cup milk
  • 2 tsp salt
  • 1 tsp dried Mustard(seeds)
  • 1 tsp Cumin
  • Olive Oil
  • 3 tbsp Butter
  • Chili flakes
  • 2 Green chili
Method:

To Prepare the sauce:

  1. First add 3 tbsp of butter into the saucepan at medium heat to avoid over browning/burning the butter
  2. After your butter has melted,add 2 tbsp of flour and stir for 2-3 minutes to minimize the lumps and blend into butter as much as possible
  3. Add a pinch of salt (chili flake can be added as per your taste)
  4. Slowly add milk while stirring constantly
  5. cook until the sauce is smooth and thickened. For thinner sauce add more milk and stir till you have your desired consistency of sauce and turn off the heat
Adding spices:

Cooking time is 1-2 minutes.
  1. Take a separate pan and add 1 tsp of Mustard seed and 1 tsp of Cumin
  2. add a pinch of salt and on medium heat cook the two till cumin turns brown
  3. turn off the heat as soon as you can smell the cooked cumin 
Keep the sauce and spices separately


Preparing the Chicken:
  1. Slice your chicken breast by running your knife in a sliding manner just close to the end like Jack and Jill went down the hill.Which then creates a heart like shape when opened up ( do not cut the through the end)
  2. Add sliced green chili ,salt and red chili flakes as per your taste
  3. Fold it back like you'd fold a sandwich
  4. Hold your chicken from the opening ends to avoid your filling from falling and butterfly (dip) the chicken into a bowl of flour
  5. Add 3 tbsp of olive oil to the pan at medium heat,when the oil has heated add the floured chicken into the pan and leave it to sizzle and cook
  6. Wait till the bottom is clearly cooked(you'll notice the chicken bulging) and then move the chicken around to make sure the flour doesn't stick to the pan,flip the chicken over and cover with a lid and slow down the heat a little
Turn of the heat after 5-6 minutes and let the chicken steam inside

Cooking vegetables:
  1. Add 3 tbsp of Olive oil in a sauce pan on medium heat
  2. Add the diced sliced onion, add pinch of salt and Chili flake
  3. fry them until brown
  4. drain out the cooked onions into separating dispenser to separate the left oil
  5. Repeat the above procedure  for your minced garlic, diced carrots and Julienne stripped
NOTE: to cook all the vegetables separately to get the essence of every vegetable separately

Bring your white sauce pan to medium heat, to make the thickened and cold sauce workable with other ingredient slowly add milk and stir till its loosened up.

then add
  1. The cooked cumin seeds and mustard seed to the sauce and stir until its mixed and turnoff heat
  2. Add the fried onion,garlic and the diced carrots to the sauce,stir till everything is mixed well.


You may use Mustard powder without Cumin seeds if you're not able to get hold of mustard seeds.

Serving:


You may Picasso-ize your dish with the sauce, chicken and julienne carrot strips as and however you like it because the sauce and chicken are ready to be dived into!

You can always cook your own way fuse up however one likes, add more herbs like mint or parsley or spices in your stuffing (this will help expand your understanding and help add your own originality to a dish later on) or just make the plate more decorative. Like my chef says, "It's your work of art, your painting!"
(Mine wasn't really a painting, just a conscious first attempt.I get better at expressing...trust me)


Please read my next post on my experiment, to avoid blunders I made making the same dish with a little amends.


Bonn Appetite:)

-A-


Monday 4 April 2011

Cordon bleu Poppy Agha


Embracing one’s culture and traditions is the corner stone to a successful career in the culinary world - this was the first lesson of our first class at PCI. Chef Amina Agha's (also popularly known as Poppy) new venture to personally train cooking enthusiast had my hair flip-flopping since the news first hit the web. In all my excitement I got my self enrolled for the first day, first class at PCI.

Like a primary kid excited for first day of school after a long summer, I couldn't wait for the night to pass and meet Poppy. Unlike the kid that wishes for the winter break to magically begin right after the second day of school, I could barely hold my excitement for my next class.

I was pleasantly greeted by Poppy as I entered. Expecting a crowd of students I found myself, Poppy and Niha (my only classmate) in a commercially set kitchen by ourselves. Now, that was a well thought decision taken by Poppy with just the two of us to be taught, each of us got just the right amount of attention that we needed. We started of with myths and facts about cooking and learnt a few hyped fancy french words used in the kitchen today, which I then learnt that those fancy words are actually a part of  our general English conversations
. We went on to cutting vegetables and their techniques (second day since my class, I'm exactly like Julia child's scene from the movie Julie and Julia...cutting a dozen onions to get it right in my next class) next was the white sauce that was fused up with Cumin seeds (Zeera) and Mustard seeds, which had me in doubts for a moment until it hit my taste buds wanting for more and more. At the end we worked with chicken, ridiculously easy techniques to end up with a crisp brown layer on the evenly cooked chicken stuffed with basics to spice it up, plated with  the delicious basic white sauce that we fused up with just two spices, fine chopped and fried vegetables. We individually set our plates to test our own creativity. Picture of my first plate:


Finally, we sat with our plates and with me starving; I was the first to clean up my dish while we chatted for a while and got to know each other. It was truly a pleasant first experience, not just the delicious meals we cooked or the simple yet important techniques we learnt in our very first class but the comfort that we felt in class with Poppy. This was the highlight of the day. She's not only a great chef but also a lot of fun and comfortable to work with whether you're striving for professionalism or just learning to make appetizing meals for  your family members.

I'll be updating my class experiences with all my wonders, blunders and recipes as I go on.


                                                              -A-